 Save to Pinterest
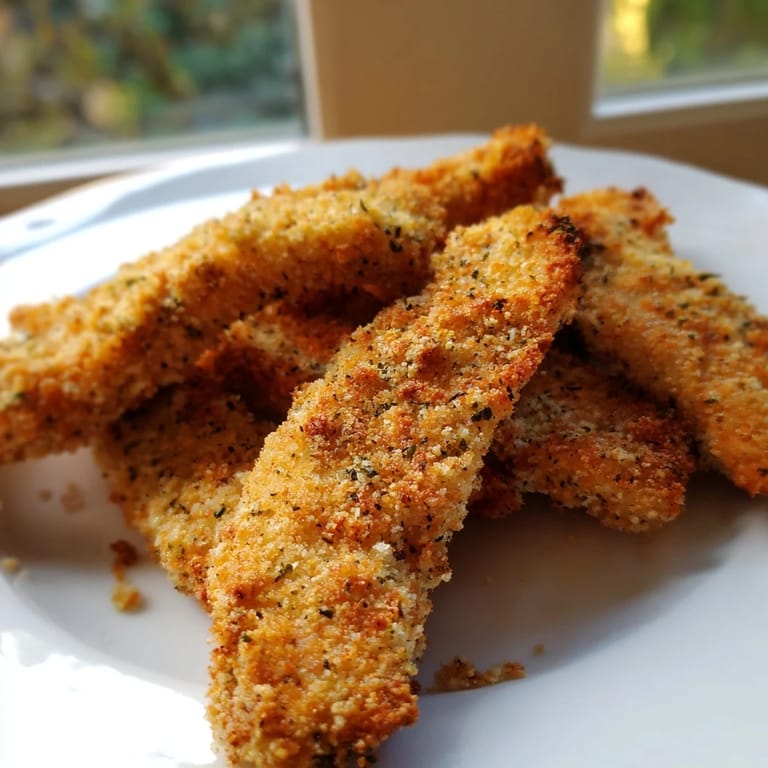
 My oldest used to refuse anything green, so I started making these strips every Thursday. The kitchen would fill with the smell of toasted garlic and paprika, and suddenly everyone wanted to help coat the chicken. What started as a picky eater solution became the meal they request most, even now that they eat vegetables without complaint.
I made these for a potluck once, thinking they were too simple to impress. Three people asked for the recipe before I even sat down. One friend admitted she'd been buying frozen strips for years and had no idea homemade could be this easy.
Ingredients
- Boneless, skinless chicken breasts or tenders (500 g): Tenders cook faster and stay juicier, but breasts work beautifully if you slice them evenly so everything finishes at the same time.
- Salt (1/2 tsp) and black pepper (1/4 tsp): Season the chicken directly so the flavor goes beyond the breading.
- All purpose flour (100 g): This first layer helps the egg mixture cling, which keeps the panko from sliding off during baking.
- Large eggs (2) and mayonnaise (2 tbsp): The mayo adds richness and helps the coating stick better than egg alone, you can swap in Greek yogurt for tang.
- Panko breadcrumbs (120 g): These Japanese style crumbs are larger and airier than regular breadcrumbs, which is why they crisp up so beautifully in the oven.
- Dried Italian herbs (1 1/2 tsp): A blend of oregano, thyme, and basil brings warmth without overpowering the chicken.
- Garlic powder (1/2 tsp) and smoked paprika (1/2 tsp): Together they add a subtle smokiness and savory depth that makes these taste like more than just breaded chicken.
- Cayenne pepper (1/4 tsp, optional): Just enough to wake up your taste buds without making things spicy, leave it out if cooking for young kids.
- Olive oil (2 tbsp): A light drizzle or spray before baking is the secret to getting that golden, crunchy finish.
Tired of Takeout? 🥡
Get 10 meals you can make faster than delivery arrives. Seriously.
One email. No spam. Unsubscribe anytime.
Instructions
- Prep the oven and pan:
- Preheat your oven to 220°C (425°F) and line a baking sheet with parchment paper, or better yet, set a wire rack on top so air circulates underneath. This keeps the bottoms from getting soggy.
- Prepare the chicken:
- Pat the chicken completely dry with paper towels, then slice it into strips about 2 cm wide. Season both sides with salt and pepper so every bite has flavor.
- Set up your breading station:
- Arrange three shallow bowls in a row: flour in the first, whisked eggs and mayonnaise in the second, and panko mixed with herbs, garlic powder, paprika, and cayenne in the third. This assembly line makes coating quick and tidy.
- Coat each strip:
- Dredge a chicken strip in flour, shake off the excess, dip it in the egg mixture, then press it into the panko until fully covered. Set it on the prepared baking sheet and repeat with the rest.
- Add the finishing touch:
- Drizzle or spray the coated strips lightly with olive oil. This step is what turns the panko golden and crispy instead of pale and dry.
- Bake and flip:
- Bake for 18 to 22 minutes, flipping the strips halfway through so both sides get evenly golden. They are done when the internal temperature reaches 74°C (165°F) and the coating is crunchy.
- Rest before serving:
- Let the strips cool on the pan for 2 to 3 minutes. This lets the coating set and become even crispier.
 Save to Pinterest
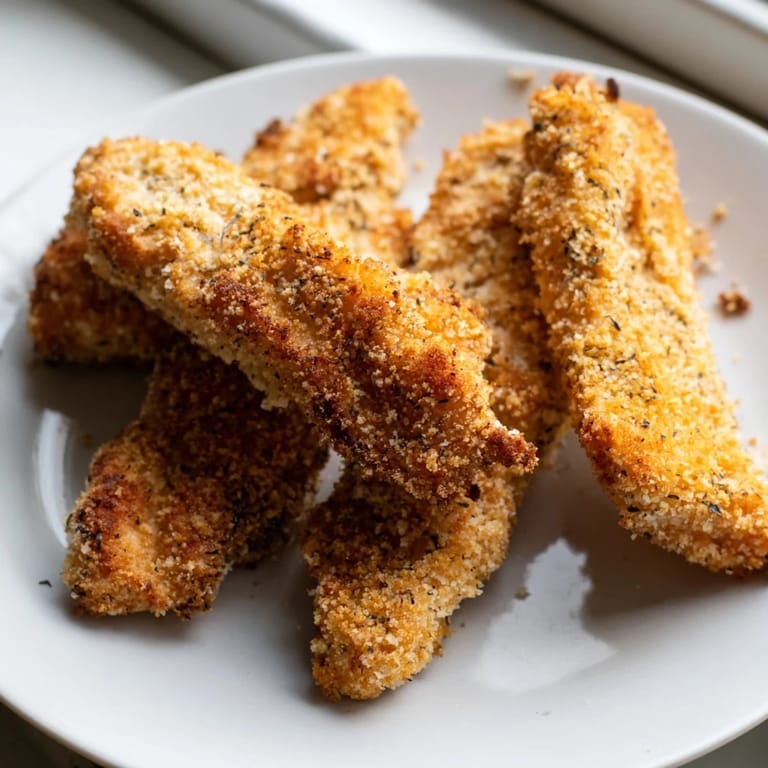
 One night my partner came home late and reheated these in the toaster oven. They came out just as crispy as when they were fresh, and suddenly leftovers became something to look forward to instead of tolerate.
Serving Suggestions
These strips are perfect with honey mustard, ranch, or a spicy sriracha mayo for dipping. I like to serve them alongside a simple green salad or roasted sweet potato wedges to round out the plate. They also work beautifully tucked into pita bread with shredded lettuce and a drizzle of garlic sauce for an easy weeknight wrap.
Make It Your Own
You can easily adapt this recipe to fit your pantry or dietary needs. Swap the all purpose flour and panko for gluten free versions if needed, the texture stays just as satisfying. If you want a richer flavor, toss a handful of grated Parmesan into the panko mixture before breading.
Pairing and Storage
These chicken strips pair beautifully with a crisp Sauvignon Blanc or a cold lager, something light that does not compete with the seasoning. Leftovers keep well in an airtight container in the fridge for up to three days, and they reheat wonderfully in a toaster oven or air fryer to bring back the crunch.
- Always check ingredient labels if cooking for someone with allergies, especially mayonnaise and panko which can contain hidden soy or gluten.
- For a spicier version, double the cayenne or add a pinch of chili flakes to the panko.
- If you are meal prepping, you can bread the strips ahead of time and keep them covered in the fridge for up to six hours before baking.
 Save to Pinterest
 This recipe has become one of those reliable favorites that never disappoints, whether you are feeding kids, hosting friends, or just need something easy and satisfying on a busy night. I hope it finds a spot in your regular rotation too.
Recipe FAQs
- → How do I get the panko coating extra crispy?
Use a wire rack on your baking sheet instead of parchment paper to allow air circulation underneath the chicken. Lightly spray or drizzle the breaded strips with olive oil, and flip them halfway through baking. This ensures even browning and maximum crispiness on all sides.
- → Can I prepare the chicken strips in advance?
Yes, you can bread the chicken strips up to 4 hours ahead and refrigerate them on a baking sheet. This actually helps the coating adhere better. Bake directly from the fridge, adding just 2-3 minutes to the cooking time for chilled chicken.
- → What's the best way to check if the chicken is cooked through?
Use a meat thermometer to ensure the internal temperature reaches 165°F (74°C) at the thickest part. If you don't have a thermometer, cut into the thickest strip—there should be no pink inside and juices should run clear.
- → Can I make this gluten-free?
Absolutely. Substitute regular flour with gluten-free all-purpose flour and use certified gluten-free panko breadcrumbs. The cooking method and times remain the same. Always verify that your mayonnaise or yogurt is gluten-free as well.
- → How should I store and reheat leftovers?
Store cooled chicken strips in an airtight container in the refrigerator for up to 3 days. Reheat in a 350°F oven for 5-7 minutes to restore crispiness, rather than using a microwave which can make them soggy.
- → Can I use Greek yogurt instead of mayonnaise?
Yes, Greek yogurt is an excellent lighter alternative that works equally well. It provides the same binding and moisture needed for the breadcrumb coating to stick. Use the same 2 tablespoon amount and whisk it with the eggs as directed.