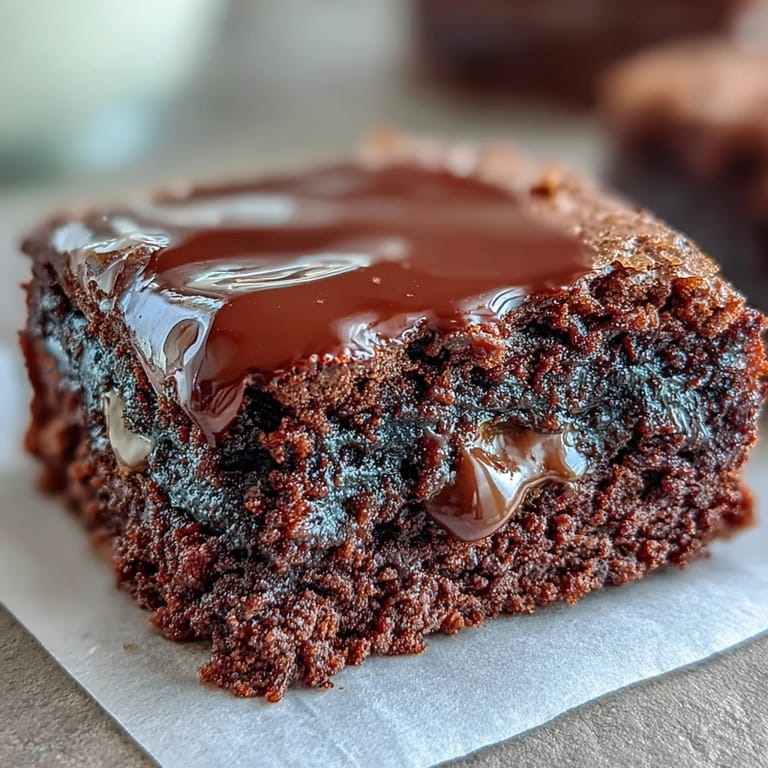
 Save to Pinterest
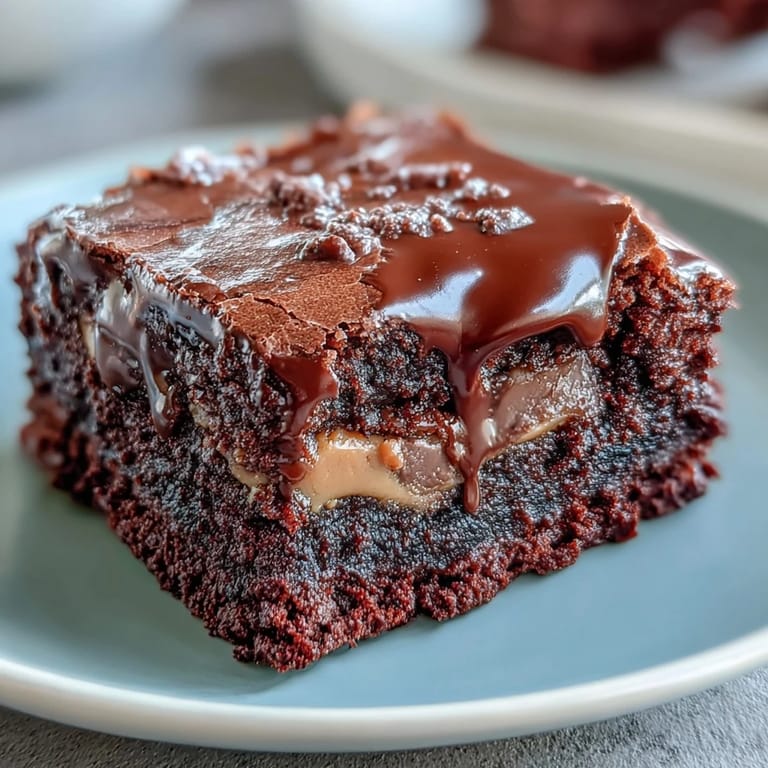
 My kitchen smelled like chocolate and butter for three days straight after my neighbor mentioned she'd never had a brownie with peanut butter cups baked right into it. That comment stuck with me more than it should have, so one Saturday afternoon I decided to test the theory that layering could be better than swirling. The result was undeniably better, and now whenever I make these, I think of her surprised face when she bit into that first square.
Last summer I brought these to a potluck and watched people reach for seconds before the main course was even finished. That's when I knew this recipe had staying power. My mom called later and asked for the exact instructions because apparently everyone at her book club had been asking about them.
Ingredients
- All-purpose flour: A full cup gives structure without making the brownies cakey, which is the delicate balance we're after here.
- Unsweetened cocoa powder: Don't skimp on quality here because this is where the real chocolate flavor lives, not in the chips.
- Baking powder: Just a touch helps these rise slightly so they stay tender in the middle.
- Salt: A pinch that nobody will taste but everyone will feel, bringing out the chocolate and peanut butter complexity.
- Unsalted butter: Melted and glossy, it creates that fudgy crumb structure we're chasing.
- Granulated sugar: Two cups creates that shiny top and deep brownie flavor from caramelization.
- Large eggs: Added one at a time so they fully incorporate and keep everything cohesive.
- Vanilla extract: A small amount that rounds out all the flavors without announcing itself.
- Semi-sweet chocolate chips: These fold in gently to add texture and extra chocolate pockets throughout.
- Mini peanut butter cups: The star of the show, nestled perfectly in the middle layer so every bite finds one.
Tired of Takeout? 🥡
Get 10 meals you can make faster than delivery arrives. Seriously.
One email. No spam. Unsubscribe anytime.
Instructions
- Heat your oven and prep your pan:
- Preheat to 350°F and line a 9x13-inch pan with parchment paper, leaving enough overhang to lift the whole thing out when it's done. This step prevents the edges from sticking and makes cleanup almost enjoyable.
- Combine your dry ingredients:
- Whisk flour, cocoa powder, baking powder, and salt together in a medium bowl until they look evenly mixed. This keeps lumps from forming when you fold everything together.
- Mix butter and sugar until glossy:
- Pour melted butter into a large bowl and add sugar, then whisk vigorously until it looks almost silky. You're not making a paste here, just coating those sugar granules in fat so they dissolve during baking.
- Add eggs one at a time:
- Crack each egg into the mixture and whisk thoroughly after each addition so the yolks fully incorporate before you add the next one. Rushing this step is why some brownies end up grainy.
- Stir in vanilla:
- Add the vanilla extract and give it a final whisk to combine everything smoothly. You should have a glossy, dark wet mixture at this point.
- Fold in dry ingredients gently:
- Pour the dry mixture over the wet one and fold with a spatula using slow, deliberate strokes until just barely combined. Overmixing develops gluten and makes brownies tough, which is the opposite of what we want.
- Fold in chocolate chips:
- Add the chips and fold gently one more time so they're distributed throughout without breaking them apart. Some will settle to the bottom, and that's perfectly fine.
- Spread the first layer of batter:
- Pour half the batter into the prepared pan and use a spatula to smooth it into an even layer. Take a moment to make sure it's fairly level so the peanut butter cups sit nicely.
- Arrange peanut butter cups:
- Space them evenly across the batter in a grid pattern so every square gets one or shares one. I use both mini and standard cups depending on what I have, and both work beautifully.
- Top with remaining batter:
- Spoon the rest of the batter over the peanut butter cups and smooth gently with a spatula until they're completely covered. Don't press down or you'll shift the cups out of position.
- Bake until barely done:
- Bake for 28 to 32 minutes until a toothpick inserted in the center comes out with just a few moist crumbs attached. Overbaked brownies are dry brownies, and we're not doing that.
- Cool completely before cutting:
- Let them sit in the pan until they reach room temperature, then lift out using the parchment overhang and slice into 16 neat squares. Warm brownies fall apart, cold ones cut clean.
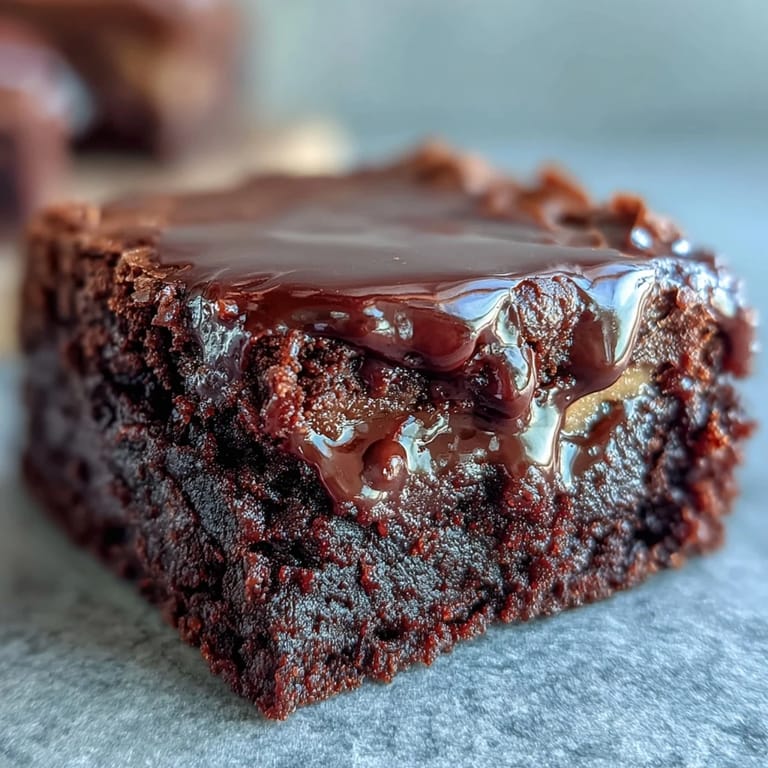
 Save to Pinterest
 I realized these brownies had become something special when my teenage nephew asked for the recipe to make them for his girlfriend. There's something about food that transcends obligation and becomes actual generosity.
The Magic of Layering
Burying the peanut butter cups in the middle instead of dropping them on top changes everything about the eating experience. The bottom layer of chocolate provides insulation so the peanut butter stays creamy, and the top layer seals in moisture and prevents oxidation. This technique transforms what could be a scattered mess into an elegant surprise.
Cooling and Storage
I've learned through trial and error that these brownies actually develop more fudgy character as they sit. Day two tastes noticeably richer than day one, and they'll stay fresh for four days sealed in a container at room temperature. If you need them faster, stick them in the fridge and they'll cut even cleaner while still maintaining that soft center.
Customization Without Losing the Soul
The structure of this recipe is flexible enough to play with while staying true to what makes it special. You can swap the peanut butter cups for caramel candies or even a spoonful of chocolate hazelnut spread, and it's still fundamentally the same beloved dessert. The key is respecting the layering principle and not adding so many additions that you lose the fudgy brownie foundation.
- Drizzle melted dark chocolate or peanut butter over the cooled brownies for extra richness.
- Serve warm with vanilla ice cream and watch people's faces light up.
- These freeze beautifully for up to three months if you ever manage to have leftovers.
 Save to Pinterest
 These brownies remind me that the best recipes aren't the most complicated ones, but the ones that bring people together with their uncomplicated joy. Make them and watch what happens.
Recipe FAQs
- → What type of pan is best for baking these brownies?
A 9x13-inch baking pan lined with parchment paper ensures even baking and easy removal.
- → Can I substitute semi-sweet chocolate chips?
Yes, dark or milk chocolate chips work well and can alter sweetness levels to your preference.
- → How do I know when the brownies are done?
A toothpick inserted in the center should come out with a few moist crumbs, indicating perfect baking.
- → Can I use different fillings instead of peanut butter cups?
Absolutely, caramel candies or chocolate hazelnut spread offer delicious alternatives.
- → What is the best way to serve these brownies?
Serve warm with vanilla ice cream or drizzle melted chocolate or peanut butter for extra indulgence.
- → Are these brownies suitable for vegetarians?
Yes, they are vegetarian-friendly but contain dairy, eggs, and peanuts.