 Save to Pinterest
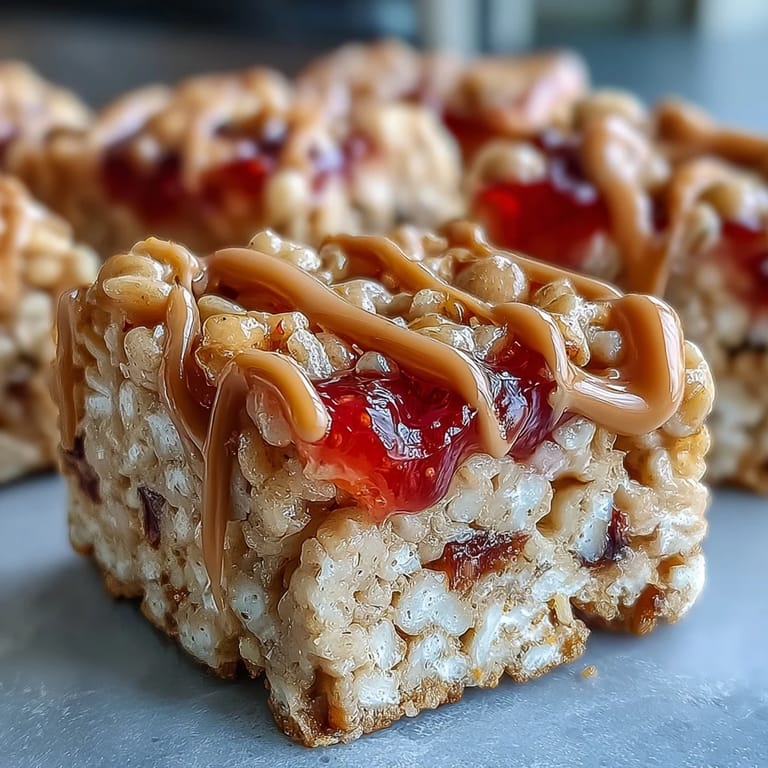
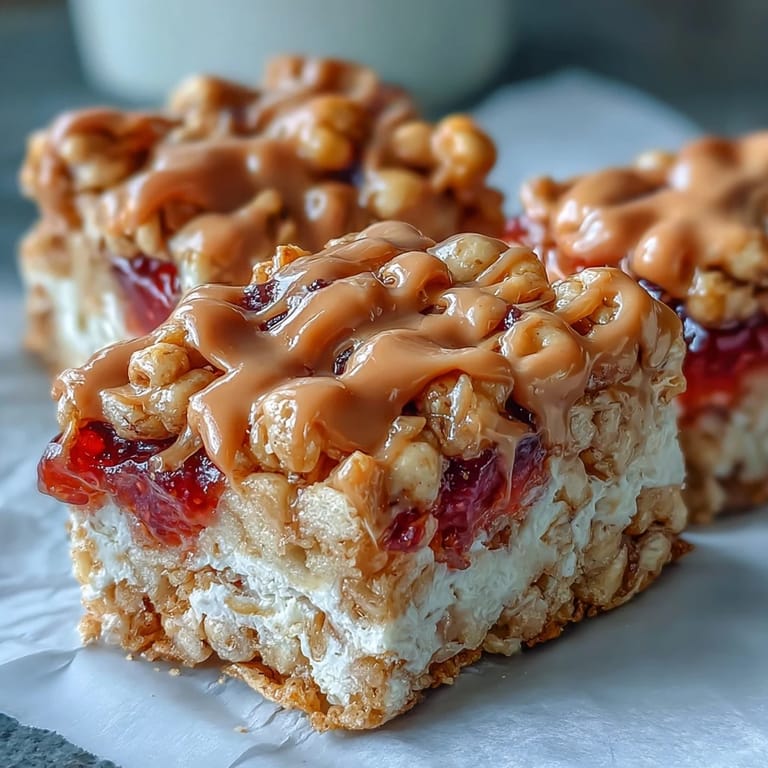
 My gym buddy Sarah showed up one morning with these bars stacked in a tupperware, and I immediately understood why she'd been raving about them for weeks. The contrast between crispy cereal and creamy peanut butter layers hit different when you're trying to dodge the usual protein bar aisle staleness. She'd somehow turned a childhood favorite into something that actually tastes indulgent while keeping you satisfied through your 10 AM meeting, and I've been making them on repeat ever since.
I made a triple batch last month for my sister's postpartum recovery kit, and watching her face when she bit into one while sleep-deprived at 3 AM told me everything. She texted asking for the recipe before I'd even left her house, which felt like the highest compliment from someone living on cold coffee and cereal anyway.
Ingredients
- Crisped rice cereal: The foundation that gives you that nostalgic crunch—use a brand you actually like since it's the star here, and make sure it's fresh from the box or your bars will turn soft.
- Creamy peanut butter: The richness factor that makes every bite taste indulgent rather than utilitarian, and honestly, the better your peanut butter, the better these taste.
- Honey or maple syrup: The binder that holds everything together while adding subtle sweetness—honey gives warmth while maple brings earthiness, so pick based on your mood.
- Vanilla or unflavored protein powder: This is your secret weapon for actually bumping the protein without weird flavors, and unflavored lets the peanut butter shine through.
- Fine sea salt: A pinch that somehow makes the peanut butter taste more like peanut butter, which sounds simple but changes everything.
- Vanilla extract: Just enough to round out the flavor without making it taste like a fragrance commercial.
- Peanut butter for drizzle: Same consideration as the base—use something creamy that flows easily when mixed with the protein powder.
- Milk: Your consistency control for the drizzle, and oat milk or almond milk work just as well as dairy if that's your thing.
- Strawberry or grape jelly: Warmed slightly so it swirls instead of sitting in stubborn clumps on top—taste it first because some brands are weirdly one-dimensional.
Tired of Takeout? 🥡
Get 10 meals you can make faster than delivery arrives. Seriously.
One email. No spam. Unsubscribe anytime.
Instructions
- Prep your stage:
- Line that 8x8 pan with parchment paper and let it overhang the sides by an inch or two—this is your escape route later and saves you from clawing at corners with a spatula. Trust me on this one.
- Create the base mixture:
- Heat the peanut butter and honey together over low heat, stirring until they're silky and combined, which takes maybe three minutes if you're patient. This isn't about cooking them, just loosening them up enough to mingle smoothly.
- Season the foundation:
- Add vanilla, salt, and protein powder and stir until you don't see any powder streaks anymore. The mixture will smell immediately like something good is happening.
- Fold in the cereal:
- Add your crisped rice and mix gently but thoroughly until every piece is coated in that peanut butter goodness. This is where the kitchen starts smelling like childhood nostalgia mixed with gym class, in the best way.
- Press and set:
- Transfer everything to your parchment-lined pan and press it down firmly with a spatula or the back of a measuring cup—you want it compact but not crushed into cement. Even pressure means even bites later.
- Mix the drizzle:
- Combine peanut butter, protein powder, and milk in a small bowl until you get something between peanut butter and pancake batter—thick enough to hold its shape but loose enough to actually drizzle. This step determines texture, so don't skip tasting the consistency.
- Layer the peanut butter drizzle:
- Drizzle that protein mixture across the top in loose lines, letting gravity do most of the work. You're going for Pinterest-worthy, not perfect.
- Swirl the jelly magic:
- Warm your jelly just enough that it moves when you spoon it, then drop strategic spoonfuls across the peanut butter. Take a knife or skewer and drag it through the layers in different directions to create actual swirls instead of a mess.
- Chill and set:
- Refrigerate for at least 40 minutes—this is when the proteins and fats solidify into something with actual structure. Set a timer so you don't forget about them.
- Cut and store:
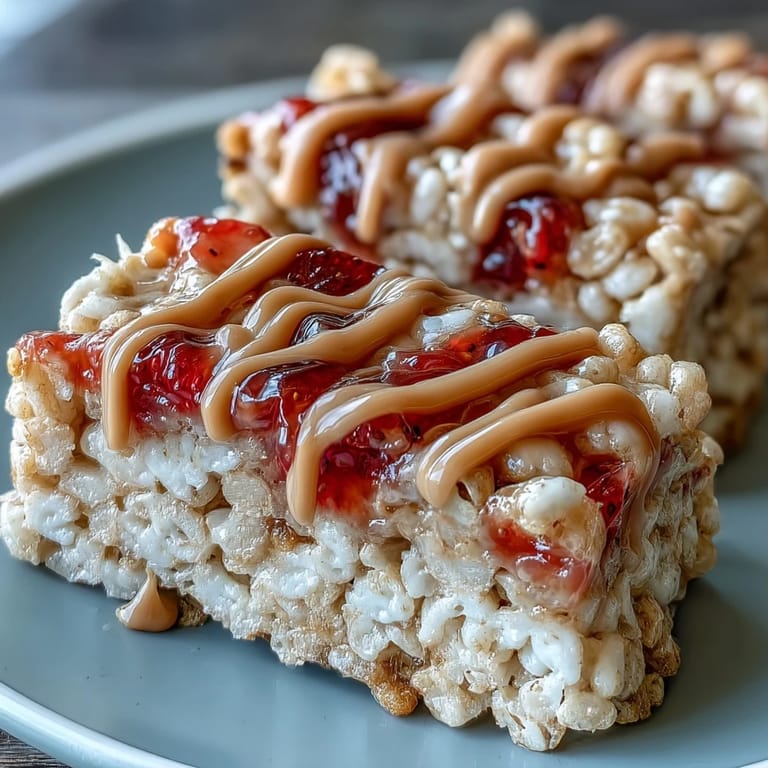
- Use that parchment overhang to lift everything out as one beautiful slab, then cut into 12 bars with a sharp knife dipped in hot water between cuts to avoid smushing. Store in an airtight container in the fridge where they'll keep for a solid week.
 Save to Pinterest
 My nine-year-old nephew once declared these better than the store-bought ones his friend's mom made, which somehow felt like I'd accomplished something greater than meal prep. Seeing a kid choose homemade over fancy-packaged changed how I think about cooking in general.
Why Temperature Matters More Than You Think
The difference between bars that taste creamy and bars that taste waxy is literally about bringing ingredients to the right warmth before combining them. When I stopped rushing this step and actually let the peanut butter get soft and the honey get pourable, the whole texture improved immediately.
Making These Yours
The beauty of this recipe is how adaptable it becomes once you understand the ratio—swap almond butter or sunflower seed butter whenever you want, experiment with raspberry jam or apricot preserves, or even play with chocolate chips mixed into the drizzle. I've also made a vegan version for my coworker by using maple syrup and plant-based protein, and honestly it tasted nearly identical.
Storage and Longevity
These bars live beautifully in the fridge for up to a week if you keep them in an airtight container, though they'll start getting a bit firmer as days go on. If you're thinking ahead for meal prep or gifting, they actually freeze surprisingly well wrapped individually in parchment—just thaw for five minutes before eating so you get that optimal texture back.
- Portion them before freezing so future you doesn't have to wrestle with a frozen block.
- Label with the date so you actually remember when you made them instead of finding mystery frozen bars in March.
- These make genuinely impressive gifts when wrapped nicely, which I learned after accidentally starting a request list among friends.
 Save to Pinterest
 These bars became my answer to the question of how to eat something that feels like a treat while actually supporting your body. They're proof that snacks don't have to choose between delicious and functional.
Recipe FAQs
- → Can I use different nut butters?
Yes, almond butter, sunflower seed butter, or cashew butter work well as substitutes for peanut butter. Keep in mind that flavor profiles will shift slightly based on your choice.
- → How long do these bars stay fresh?
Store bars in an airtight container in the refrigerator for up to one week. They can also be frozen for up to three months—just thaw at room temperature before enjoying.
- → Can I make these vegan?
Use maple syrup instead of honey and select a plant-based protein powder. Ensure your crisped rice cereal is certified vegan, as some brands contain vitamin D3 from animal sources.
- → What protein powder works best?
Vanilla or unflavored whey or casein powder blends smoothly. For plant-based options, pea protein or vanilla blends work well. Avoid strongly flavored powders that might clash with the peanut butter and jelly.
- → Can I reduce the sweetness?
You can decrease the honey or maple syrup to 1/4 cup, though the bars may be slightly less cohesive. The jelly also contributes sweetness, so choosing a less sweet variety helps balance overall sugar content.
- → Why chill before cutting?
Chilling allows the protein-enhanced binder to set completely, ensuring clean cuts and bars that hold their shape. Warm bars will crumble and won't slice neatly.